What’s all this about?
Due to numerous requests to share more of the development process, I thought I’d show a sneak peek at this week’s game, and give a bit of insight into the process. This week’s game is a simple first-person shooter of sorts. I won’t ruin too much of the gameplay, but I will say that each round of the game takes place in a randomly-generated arena. I’ve got the basics of the level-generation down; Here’s a video (sorry about the annoying mouse pointer on the screen):
Now, I have my reasons for making the level randomly generated. Sure, it might not always turn out to be a perfect level, but it’s incredibly time efficient. Creating massive amounts of content is possible without the need of hand-crafting each level. Additionally it holds the player’s interest for longer, and makes the experience less repetitive. Both of these things are great when you have limited time and resources.
Behind the Video
Each level is stored in a 2×2 array, where each item represents the tile at that x-y location. There are many different types of tiles that can be generated, from floors and ramps to bridges and platforms.
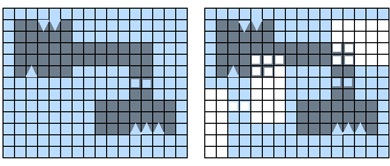
I started with generating an area approximately 10-20 units long on each side and filled it completely with the middle floor level. Then I chose 2-4 areas in which to place some squares of the lowest floor level (which I call “pits”). A “hallway” is also created which is one or two tiles thick, and connects the center of two of the pits. A bridge or two is sometimes added across a random part of the pits/hallway as well.
The next step was to create some ramps down into the pits. I iterated over each pit, and added 3-5 ramps to random points along its edges where applicable. I then added a few randomly-sized squares of the third, highest floor. This floor is a solid block when it’s placed over the middle floor, but becomes a bridge/overhang when it’s placed over a pit.
 A similar method as before is used to add ramps leading to to the upper floor. Some areas containing obstacles (poles) at different density levels are placed throughout the area. Finally, the map doubled in size. Some elements of the map are flipped or mirrored, while some may not be. After all this is finished, a script iterates over each item in the array of tiles and places the appropriate mesh, with the appropriate rotation, in the game world.
And there you have it! That’s pretty much how my level-generator was created. Come back this Thursday to play the finished product, as well as see more insight into the design process!


tutelagesystems
/ September 19, 2011Huge difference between week 1 and week 2
terrydif
/ September 19, 2011Is that a good or a bad thing?
some guy
/ September 20, 2011Good. Definitely good. It’s looking great, can’t wait for more!
tutelagesystems
/ September 20, 2011Yes definitely good.